
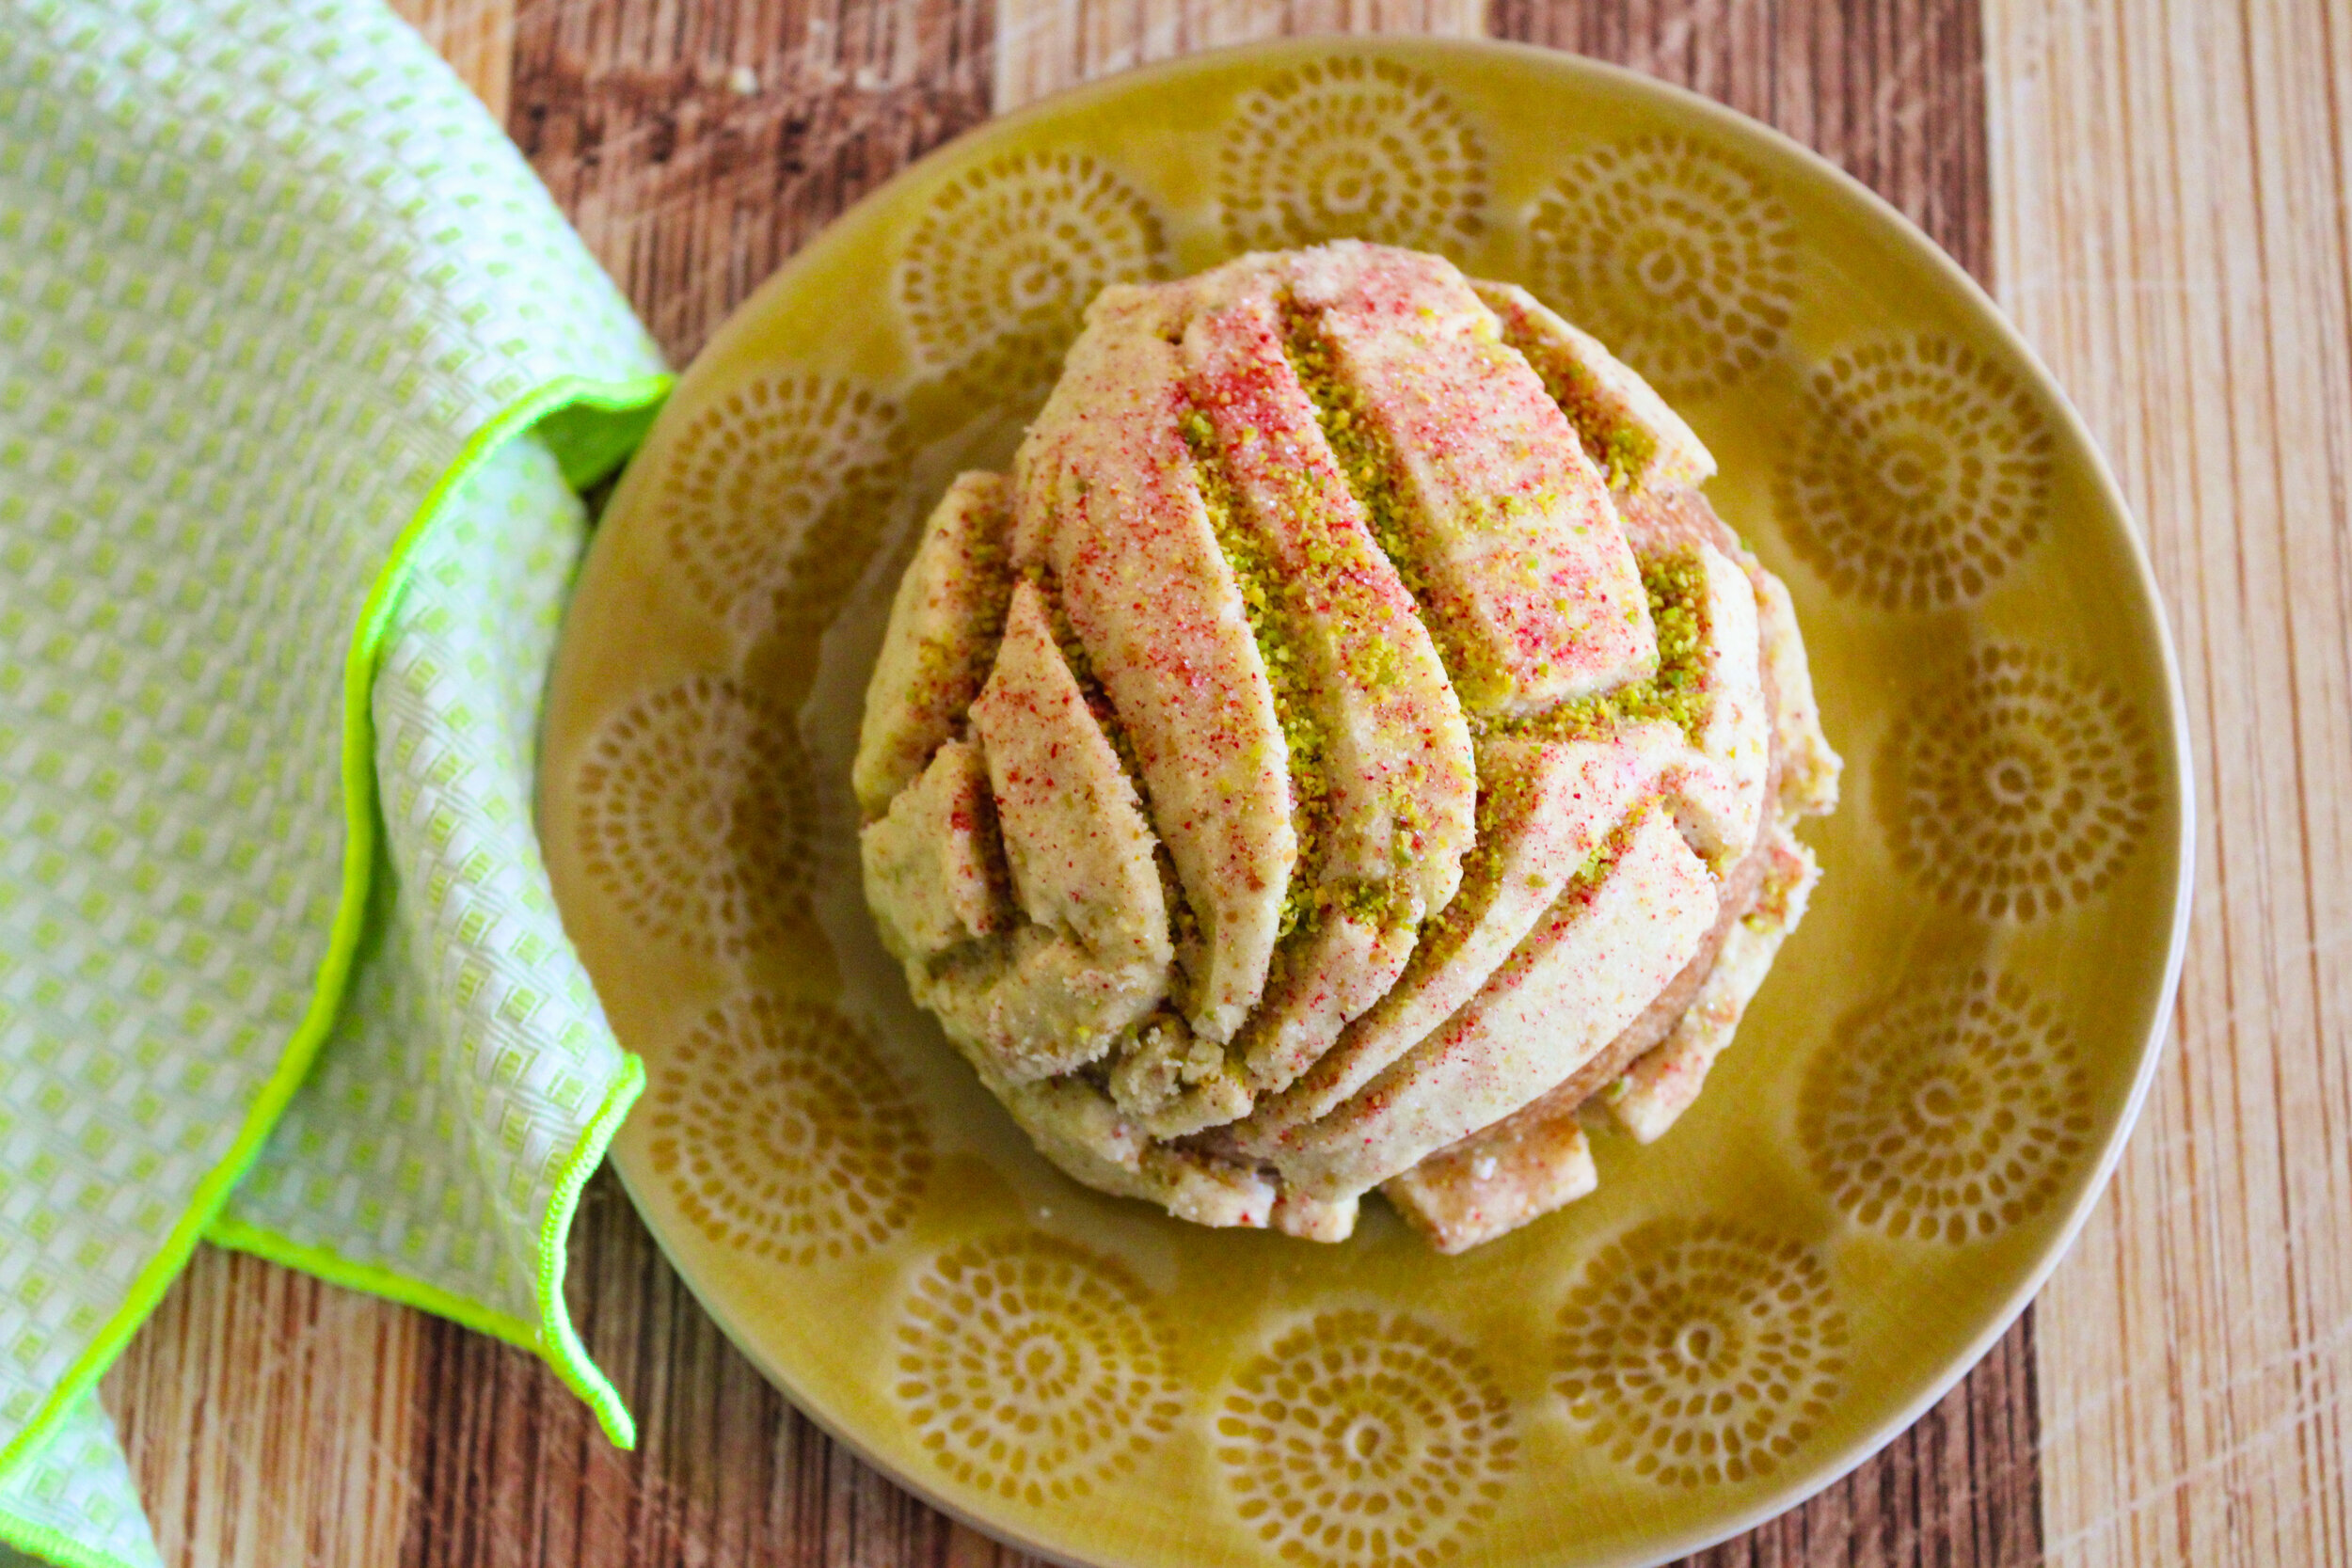
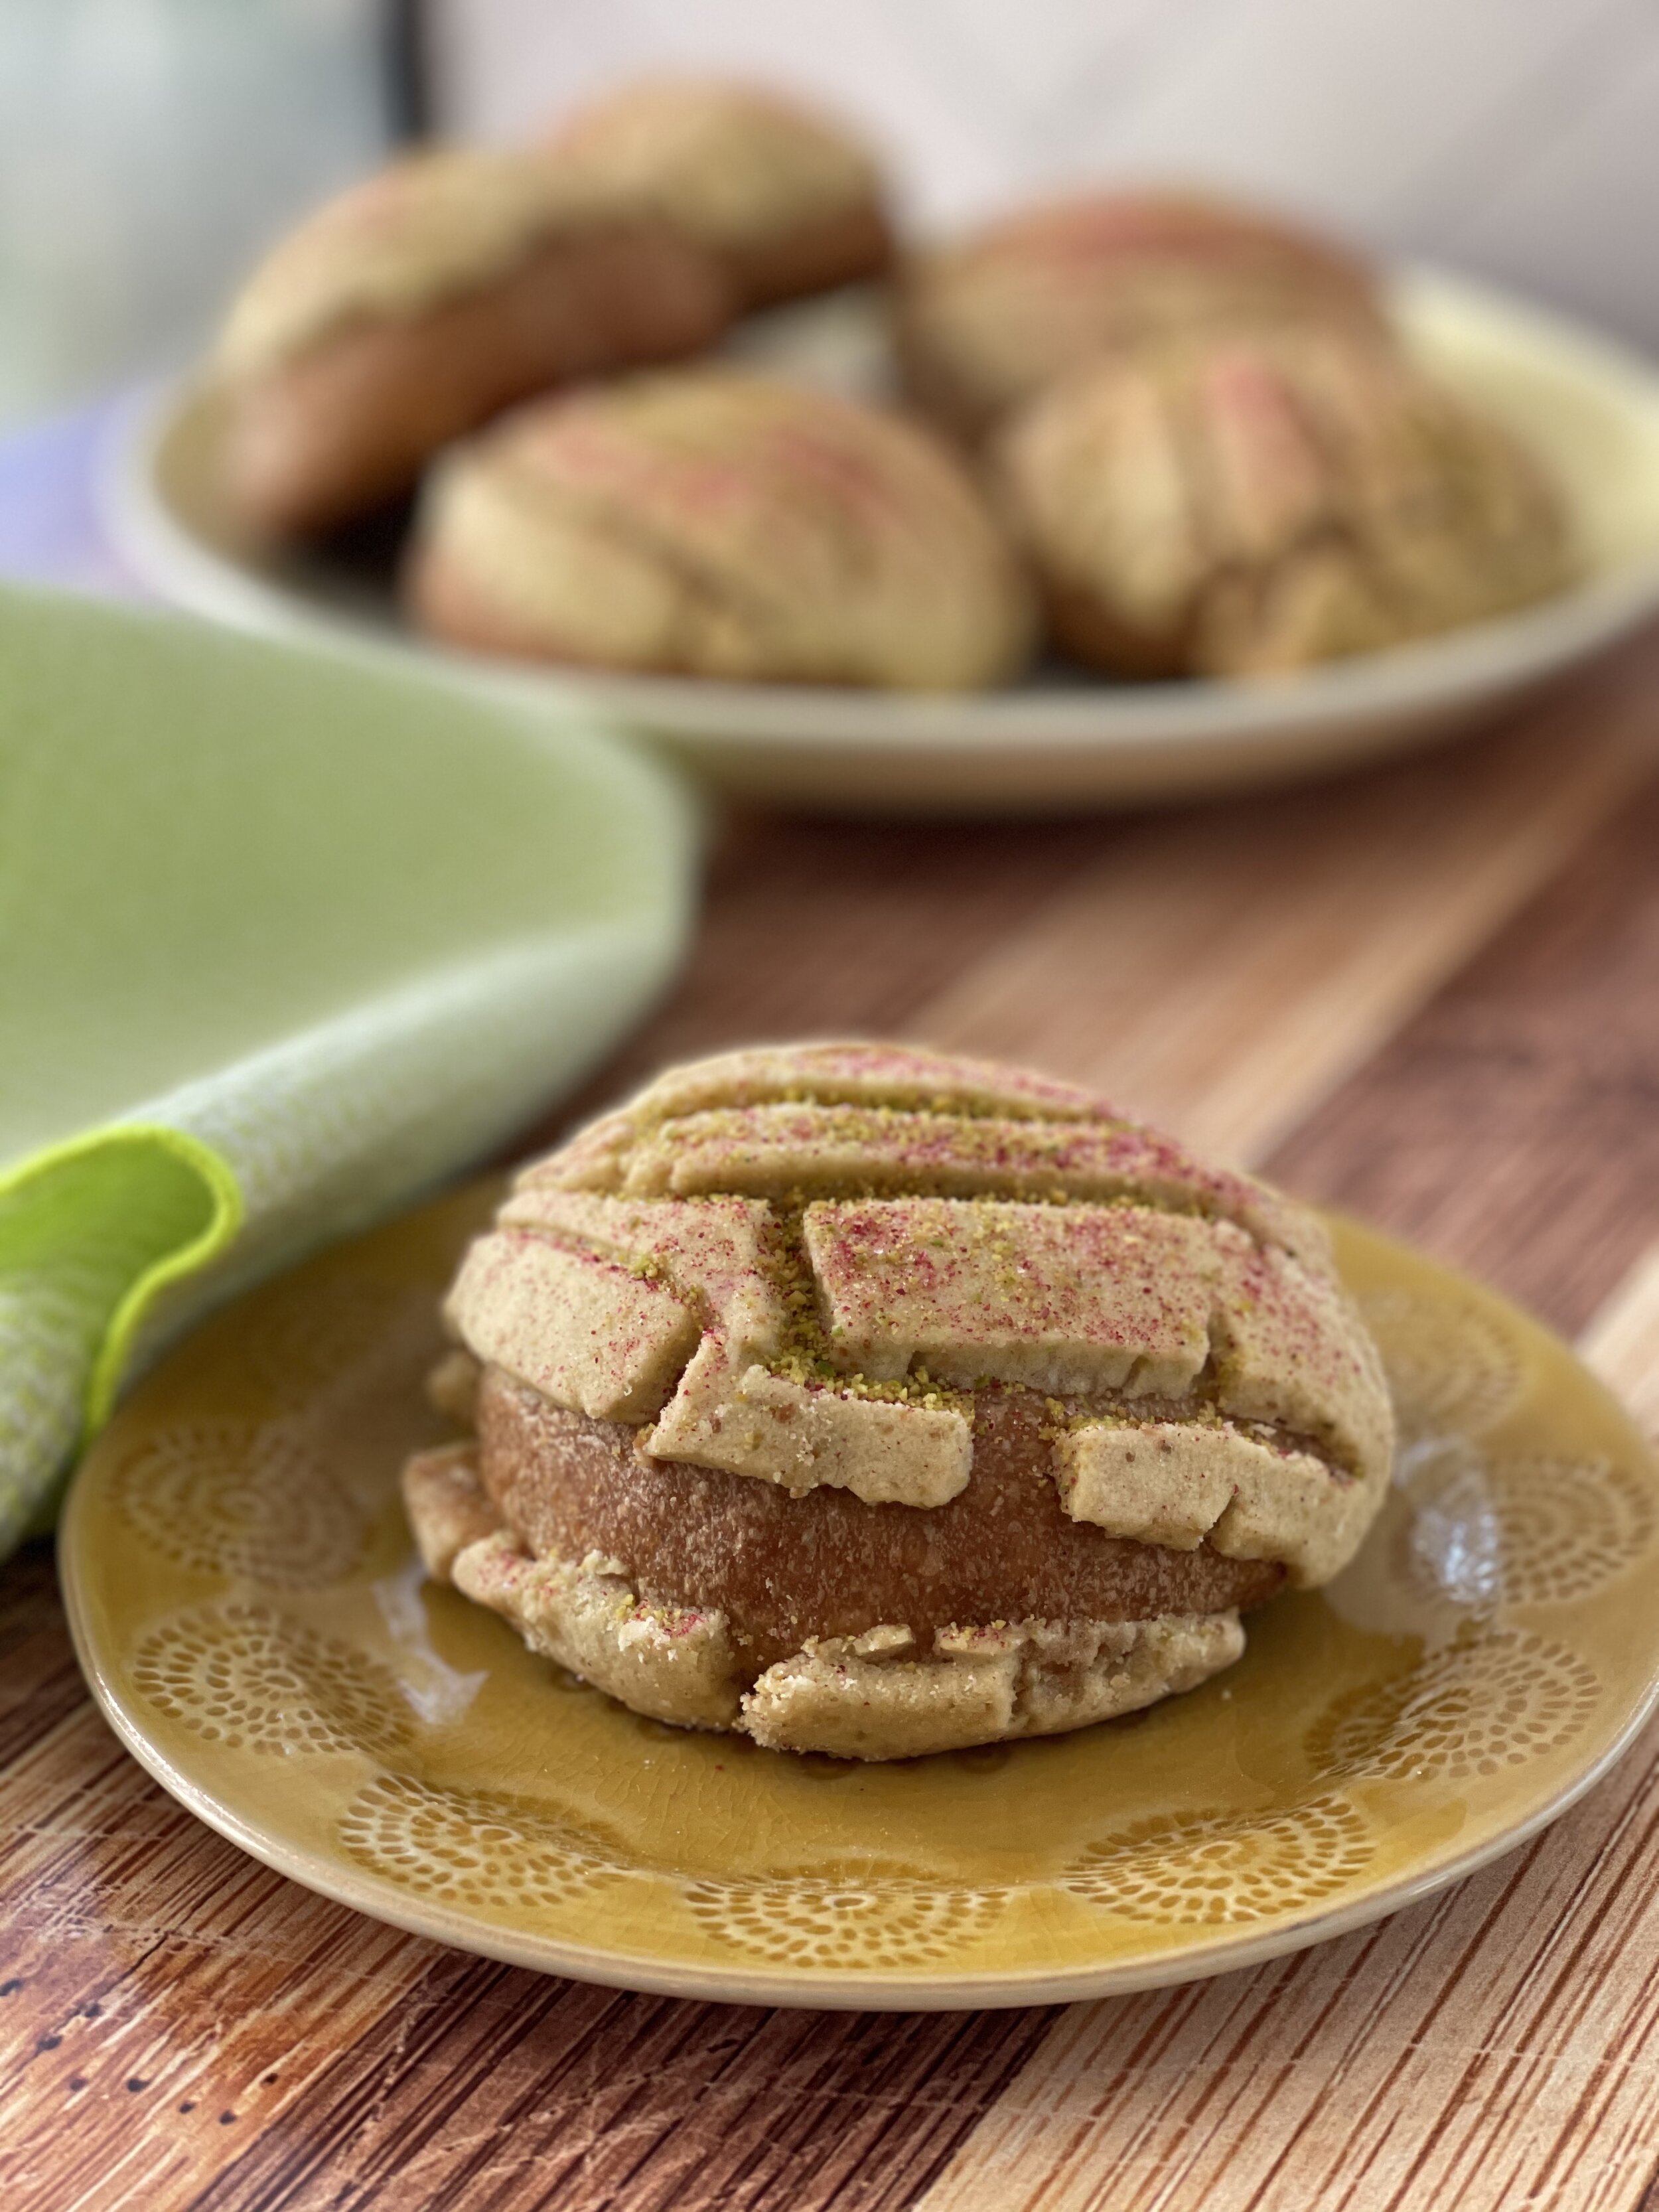
raspberry and pistachio conchas
Homesickness is the reason for these conchas. Even before a deadly virus changed almost everyone’s lives I lived with a low-level hum of homesick, barely buzzing in the background of my everyday but still annoyingly present. When I think of home and of living 2,500 miles from home, it’s my grandparents that come to mind first.
My grandparents basically raised me and my sister and brother in tandem with my mom, who was working her way up the banal corporate ladder at a Silicon Valley software company. It was always at grandma and grandpa’s house that we had conchas, although admittedly there aren’t a ton of concha memories for me to pull from. On the few occasions we did have conchas it was because we had visited the Berryessa Flea Market in San Jose with my grandparents and brought pan dulce home with us, along with the flea market’s other specialty: churros. Or maybe my grandpa had been to the mercado earlier in the day to pick up tamarindo candies that he could only find at the mercado and got some pan dulce to share. I remember thinking conchas were dry, not something my second-generation Americanized, still developing young self would choose over say, the stack of overtly sweet Hostess cakes my grandparents always had for us grandkids.
I truly appreciated conchas when I decided to make them, an idea that was born from wanting to impress my grandpa.

I read many and many of the concha recipes the internet put in my path; my own recipe being a combination of these internet concha recipes, yet still my own. (This is a good example of what I mean when I say I am an “internet-taught” baker.) Of all the recipes I read, four really stood out to me as guiding lights. I studied this one from Esteban Castillo of the very popular, very colorful blog Chicano Eats and decided I would trust his use of shortening in the topping, as well as his method of flattening the topping with the back of a pie plate since I still don’t have a tortilla press. Then there was Rick Martinez’s beautiful Black-and-White Conchas where I plucked the use of vanilla paste in lieu of vanilla extract for a boost in flavor. I could not tell you how many times I watched this video tutorial from food vlogger Claudia Regalado. Watching Claudia make her conchas was absolutely invaluable to me because I learned from her how the dough should look, and that mixing the topping by hand was probably best so I could be guided by sense of touch (you want the topping mixture to feel like Play-Doh in texture and consistency). Finally, it was from Mely Martinez’s recipe of the food blog Mexico in My Kitchen that I modified for the base of my concha because most of all I appreciated that the ingredients are measured by weight, which made me go into my first concha-making experience with confidence.
I knew from the jump that I wanted to play around with flavors. I knew I didn’t want to make a vanilla concha dough with the traditional and most common cinnamon/vanilla (white), chocolate (brown), or strawberry (pink) topping. It’s true that I tend to not leave well enough alone. I never thought of myself as a person who challenges herself (why would I want to be that kind of person? Life is already hard enough!) until I made these conchas. Initially a pistachio concha with cherry topping came to mind. Despite pistachio being a notoriously difficult flavor to capture, especially after baking, it was pistachio that I had my heart set on. I had some leftover freeze-dried cherries from another baking project that I thought I could simply blitz down into a powder with my food processor.

For reasons I still haven’t figured out the cherries didn’t grind down well and instead became a sticky, clumpy mess so they were nixed in favor of freeze-dried raspberries, another ingredient I already had on hand. Pistachio flavor in the dough proved to be tricky. I used Stella Parks’ method from Serious Eats to shell, blanch, then peel the pistachios to help bring out that great pistachio flavor. I let the nuts dry out over night, then finely ground them like instructed in this piece from the LA Times, although this is not pistachio “flour” and is merely finely ground pistachios. I also made pistachio paste, again from the great Stella Parks with the idea that I’d blend it into the milk before adding the pistachio-milk mixture to the concha dough.
True to form, the pistachio flavor was too muted despite my efforts and the power of my sheer determination (lol). Additionally I had major problems with my raspberry topping not being crunchy enough. All pan dulce is very important to Mexican culture and I wanted to make sure I was being as respectful both to the ingredients and the method of conch-making as possible. Even the idea to sprinkle raspberry sugar and ground pistachio on top of the concha gave me some pause because I had not noticed any of the recipes I read adding anything in terms of adornment or decoration to the topping.
Something about the freeze-dried fruit really did not play well when incorporated into the other ingredients and rendered the consistency too sticky before baking, and too soft with not a crunch to be found after baking. My friend Sadie, chef and baker of Minneapolis-based Babe in the Woods Baking Company was generous enough to help me troubleshoot, and truthfully this recipe feels basically as much theirs as it does mine. Together we brainstormed ideas and potential fixes and then I’d go back to the kitchen and try again. (There is no moral story of perseverance here though, I am just stubborn.)
In somewhat of a eureka moment one morning after having tested the pistachio dough three times, and the raspberry topping about five times, I realized I was approaching my concha backwards. Would ground freeze-dried raspberry work better in the dough? Maybe the ground pistachio and pistachio paste would reveal themselves better in the topping? Long story short: I tried that and it worked. The raspberry flavor was still sublte though I wasn’t too mad at that; the powder also turned the concha dough a soft purple color (I suggest sifting the finely ground freeze-dried raspberries through a fine-mesh strainer to get rid of the raspberry seeds), while the pistachio in the topping gave me the signature crunch I had been wanting.
This recipe is a project. I suggest taking a whole weekend and breaking it down into smaller parts. Start with dealing with the pistachios so they can dry out overnight if you are using the Stella Parks method of removing the pistachios skins, which you should in my humble opinion. I bought shelled pistachios, but if you want to be smarter than me get them unshelled. I think if you wanted to skip making pistachio paste you could probably get away without it in the topping. I mostly added it to my topping because I had it on hand from testing and needed to use it up. In this case, I would add a bit more almond extract to help bring out the nutty flavor, maybe 1/4 teaspoon more (be careful not to go wild with adding almond extract as it is very strong). If you wanted to make the dough ahead of time, I had no problems with shaping the concha dough into balls, freezing those on a small baking sheet and then transferring them to a plastic bag once they’ve frozen. The topping should be made fresh (this means the day you plan on baking the conchas) so it doesn’t dry out, which it has a tendency to do. The topping is forgiving. I accidentally added too much shortening once and all it took was an additional tablespoon of flour to get the ratio right. So if your topping feels too dry, add more shortening a tablespoon at a time. If it feels too wet, add more flour a tablespoon at a time.

Make sure to give your dough enough time to rise in a warm place. This is what I do: when I begin making the dough I preheat my oven to 350F. Right before adding the milk to the dough, I turn the oven off. Then when the dough is ready for its first rise, I place it in a greased medium-size bowl, cover the bowl with a kitchen towel, then into the oven it goes. Every time I tested this recipe, my dough rose within 2 hours. Also just as a side note: you really don’t need to buy a concha cutter to make conchas. I had no issues using a small knife to make my concha pattern, though of course this takes a big longer and requires patience.
Tasting my concha for the first time made me emotional. This was likely due to an ever-present pandemic exhaustion. But it was also the homesickness, another enduring presence, and just a feeling of frustration that my recipe up until that point was fine but not want I wanted that literally made me burst into tears, wishing I could share both the moment and the concha with my grandparents. I’m living for the day that I can.
Raspberry & Pistachio Conchas
Yield: 14 conchas
Active time: 15 minutes
Rise time: 2 hours on first rise; 1 hour on second rise
Bake time: 20 minutes
Total time: about 3 hours, 35 minutes
Raspberry conchas:
500 grams (3 3/4 cups) bread flour
125 grams (1/2 cup + 2 tbsp) granulated sugar, reserve 1 tablespoon for raspberry sugar
7.5 grams (2 1/2 tsp) instant yeast
1/2 teaspoon table salt
9 grams finely ground freeze-dried raspberries, reserve 1 tablespoon for raspberry sugar
1/2 cup (1 stick) unsalted butter, room temperature
3 large eggs
5 ml (1 tsp) vanilla paste or extract
120 ml (1/2 cup) of milk, warmed in microwave for 15 seconds
Pistachio topping:
120 grams (1 cup) all-purpose flour
4 ounces confectioner’s sugar
30 grams finely ground pistachio
3.37 ounces (about 1/2 cup) vegetable shortening
1/4 teaspoon table salt
2 tablespoons pistachio paste, optional
1 teaspoon almond extract
To make the conchas:
Preheat oven to 350F; this is just to create a warm environment for the dough to rise in.
In a small bowl, mix the equal parts ground raspberry and granulated sugar; set aside.
In the bowl of a stand mixer or in a large bowl, whisk the bread flour, granulated sugar, instant yeast, table salt, and finely ground raspberries just to combine.
With the mixer set on medium speed (speed 6 on a Kitchenaid mixer) and the dough hook attached, add the room temperature butter. If mixing by hand, just make sure to incorporate the butter well before adding the eggs. At this point you should warm your milk in the microwave for 15 seconds.
Next add the eggs one at a time and mix to incorporate. Now is when you want to shut the oven off.
Slowly drizzle the warmed milk into the dough. If the dough is looking a little sticky (read: it’s not pulling away from the sides of the bowl), sprinkle in more bread flour, a tablespoon at at time. Continue mixing the concha dough on medium speed for about 5 minutes to develop that gluten.
Transfer the concha dough from the bowl to a lightly floured surface. Knead the dough for about 2 minutes, you’re just helping it to come together and continuing to help develop gluten. The dough should be very soft and pillowy.
Place concha dough into a greased medium-size bowl and drape a kitchen towel over the dough. Set the bowl into the pre-warmed oven and let the dough rise for about 2 hours. You are looking for a dough that has doubled in size around the two hour mark.
To make the topping:
While the dough is rising, make your pistachio topping. Add all the ingredients to a medium-size bowl and using your hands (or a pastry cutter, if you must) work the mixture into a paste, making sure to break down the shortening and pistachio paste, if using. If the topping feels too dry, add more shortening a little at a time. If it feels too wet or sticky, add more flour a little bit at a time. The mixture should feel like Play-Doh once all ingredients are incorporated. If you’re not using any pistachio paste, I would add about an additional 1/4 teaspoon of almond extract to help coax out the nutty flavor in the pistachio.
Place the topping mixture into an air-tight container and set aside just on your kitchen counter while the dough continues to rise.
To form the concha dough:
When the dough has risen and doubled in size, remove from the warm oven and place on a lightly floured surface. Let the dough rest for about 5 minutes. It should even more soft and pillowy than before rising.
After 5 minutes, divide the dough into small balls that weigh 70 grams. It is important that the concha balls are universally the same weight so that they all bake at the same time. To form the conchas, gently pull and stretch a concha ball under itself so as it create a smooth top. I recommend watching this video from Claudia Regalado to see how she shapes her conchas. After creating a smooth top on the concha ball, I set the concha down on my counter and using one hand, continue to form the concha by rolling my hand over the concha while at the same time gently pressing down onto the counter in a circular manner. I know this sounds confusing but you’re basically just going for a round concha ball. Do the best you can.
Place all formed concha balls onto two large parchment paper lined baking sheets and rub the tops and sides of each dough ball with either softened butter, softened shortening, or pistachio oil if you have it. Set concha balls aside while you form the topping.
To form the topping:
Divide the topping into 14 equal parts that weigh 20 grams each.
Set one topping piece on top of a piece of parchment paper, then set a second piece of parchment paper on top of that. Using the back of a pie plate, flatten the topping to form a thin, flat circle. Peel the parchment away from the topping circle carefully and slowly. If the topping sticks too much, or breaks at all I promise it is fine and you have done nothing wrong. Just go slowly and do your best.
Place a topping circle onto a greased concha ball and press down firmly. Continue with the remaining topping pieces until all concha balls are covered with the topping.
Using either a concha cutter or a small knife, slice lines into the topping that resemble a seashell, or concha.
Cover the conchas with kitchen towels and let them rise in a warm place (I heat my oven to about 300F, then set both baking sheets with the conchas right on top ) for a second time until doubled in size, about an hour. Around the 30 minute mark, turn up the oven temperature to 325F.
Bake conchas:
Once conchas have doubled in size, bake one baking sheet at a time for about 20 minutes. You’re mostly looking for the conchas to have browned on the bottom a bit. Immediately after taking the conchas out of oven, sprinkle a little raspberry sugar and more ground pistachio for a bit of crunch and honestly it just looks pretty. Serve warm.
To store the conchas:
Conchas are best enjoyed right after baking, however these will last about 3 days if stored in an airtight container or plastic bag with a zip lock. On the second and third day, if you find the conchas to be a bit stale simply warm them in the microwave for about 10 seconds. I haven’t tested the shelf life for freezing these conchas, but if you do this, let me know how it turned out!